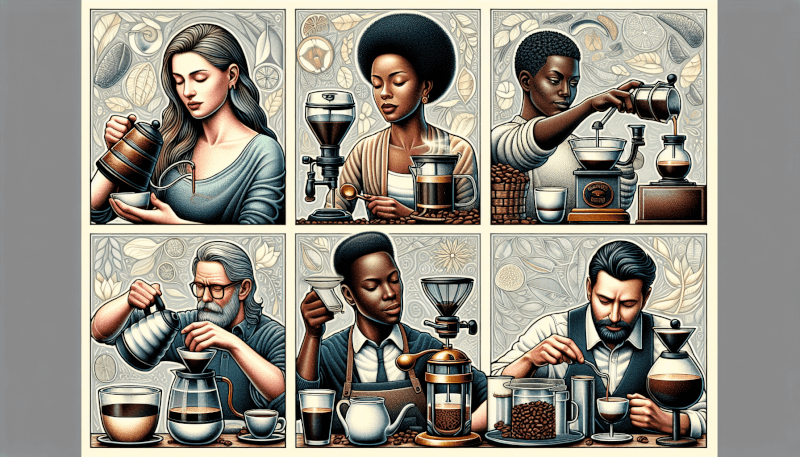
Are you tired of your usual cup of coffee and looking to explore different brewing techniques? Look no further! In this article, we will take you on a journey through various methods of brewing coffee, from the classic French Press to the trendy pour-over. Discover the unique flavors and aromas that each technique extracts from the beans, and find your new favorite way to enjoy your daily cup of joe. Grab your mug and get ready to embark on a coffee adventure!

Different Coffee Brewing Techniques
Are you ready to explore the wonderful world of coffee brewing techniques? There are so many ways to make a delicious cup of coffee, each with its own unique flavor profile and brewing process. In this comprehensive article, we will walk you through ten popular brewing techniques, from drip brewing to cowboy coffee. So grab your favorite mug and let’s dive in!
1. Drip Brewing
1.1 Equipment Needed
To brew coffee using the drip brewing method, you will need a few essential items:
- Drip brewer machine or a manual drip cone
- Coffee filter
- Freshly ground coffee beans
- Water
- Coffee mug
1.2 Brewing Process
Drip brewing is one of the most common and convenient methods for making coffee. Here’s how you can do it:
- Start by filling the reservoir of your drip brewer machine with water or heat water separately if using a manual drip cone.
- Place a coffee filter in the designated section of your machine or manual drip cone.
- Add the appropriate amount of finely ground coffee to the filter. The general rule of thumb is 1 to 2 tablespoons of coffee per 6 ounces of water, but you can adjust it to your preferred taste.
- Turn on the machine or slowly pour hot water over the coffee grounds in the manual drip cone. Make sure to cover all the coffee grounds evenly.
- Wait for the water to pass through the coffee grounds and drip into your coffee mug.
- Once the dripping stops, remove the filter with the used coffee grounds.
- Enjoy your freshly brewed cup of drip coffee!
1.3 Pros and Cons
Drip brewing offers several advantages, which is why it has become a popular choice for many coffee lovers. Here are the pros and cons of this brewing technique:
Pros:
- Convenience: Drip brewing is incredibly easy and convenient, especially with a drip brewer machine.
- Consistency: You can achieve a consistent flavor profile with drip brewing by controlling the water temperature and brew time.
- Quantity: Drip brewing allows you to brew larger quantities of coffee at once, making it great for hosting guests or preparing multiple cups for yourself.
Cons:
- Lack of control: Drip brewing may not provide the same level of control over variables like water temperature and extraction time compared to other brewing methods.
- Filter dependency: The use of paper filters in drip brewing can affect the flavor and aroma of the coffee by trapping some of the oils and sediments.
Drip brewing is an excellent choice for those seeking a hassle-free coffee brewing method that consistently delivers a tasty cup of joe.

2. French Press
2.1 Equipment Needed
To make coffee using a French Press, gather the following items:
- French Press
- Freshly ground coffee beans
- Water
- Coffee grinder (if you don’t have pre-ground coffee)
- Coffee kettle or pot
- Coffee mug
2.2 Brewing Process
The French Press method is known for its rich and full-bodied coffee. Here’s how to use a French Press:
- Start by heating water to a temperature just below boiling, around 200°F (93°C).
- While the water is heating, add coarsely ground coffee to the French Press. The general ratio is 1 tablespoon of coffee per 4 ounces of water, but you can adjust it according to your taste preferences.
- Once the water reaches the desired temperature, pour it over the coffee grounds in the French Press and give it a gentle stir to ensure all the grounds are fully saturated.
- Place the plunger on top of the French Press, but don’t press it down just yet. Let the coffee steep for about 4 minutes.
- After the steeping time, slowly press the plunger down, separating the brewed coffee from the grounds.
- Pour the coffee into your mug, and it’s ready to enjoy!
2.3 Pros and Cons
French Press brewing has its unique charm and offers several advantages. Take a look at the pros and cons of this brewing technique:
Pros:
- Full-bodied taste: French Press brewing extracts more of the coffee’s natural oils and flavors, resulting in a rich and robust cup of coffee.
- Control over extraction time: You have full control over the steeping time, allowing you to adjust the strength of your coffee according to your liking.
- No need for paper filters: French Press doesn’t require paper filters, which means you retain more of the coffee’s natural oils, resulting in a more pronounced flavor.
Cons:
- Slight sediment in the cup: The absence of a filter can lead to some sediment in your coffee, which some people may find undesirable.
- Cooling quickly: French Press coffee tends to cool down faster than other brewing methods, so it’s best to enjoy it promptly.
French Press brewing offers a delightful and full-bodied coffee experience, perfect for those who appreciate bold flavors and a touch of luxury in each sip.
3. AeroPress
3.1 Equipment Needed
To brew coffee using an AeroPress, gather these essential items:
- AeroPress
- AeroPress paper filters
- Freshly ground coffee beans
- Water
- Stirrer or spoon
- Coffee grinder (if you don’t have pre-ground coffee)
- Coffee kettle or pot
- Coffee mug
3.2 Brewing Process
The AeroPress is a relatively new and innovative brewing method. It’s known for producing a clean and well-extracted cup of coffee. Here’s how to brew coffee with an AeroPress:
- Start by heating water to a temperature around 175°F (79°C).
- While the water heats, prepare the AeroPress by inserting a paper filter into the filter holder and rinsing it under hot water to remove any papery taste.
- Attach the filter holder to the bottom of the AeroPress and place it on top of your coffee mug or carafe.
- Add your desired amount of finely ground coffee to the AeroPress. The general ratio is 1 to 2 tablespoons of coffee per 6 ounces of water.
- Once the water reaches the appropriate temperature, slowly pour it over the coffee grounds, ensuring all the grounds are fully saturated.
- Use the provided stirrer or a spoon to give the coffee a gentle stir to promote even extraction.
- After stirring, attach the plunger to the top of the AeroPress and gently apply downward pressure to the plunger, gradually forcing the brewed coffee through the filter and into your mug.
- Stop pressing when you hear a hissing sound or when the plunger reaches the bottom of the AeroPress.
- Remove the AeroPress from your mug and enjoy your meticulously brewed coffee!
3.3 Pros and Cons
AeroPress brewing has gained popularity among coffee enthusiasts due to its versatility and ability to produce a clean and flavorful cup. Let’s explore the pros and cons:
Pros:
- Quick and easy: AeroPress brewing is relatively quick and straightforward, making it an excellent option for those busy mornings or when you’re on-the-go.
- Consistent results: The AeroPress provides consistent results by allowing precise control over variables like water temperature, brew time, and pressure.
- Easy cleanup: The AeroPress is easy to clean, as you can simply eject the coffee grounds and rinse the components.
Cons:
- Limited quantity: The AeroPress is designed for single servings, so it may not be the best option if you need to brew larger quantities of coffee.
- Different taste profile: While the AeroPress brews a delicious cup of coffee, it may have a slightly different flavor profile compared to other brewing methods due to its unique extraction process.
The AeroPress offers a versatile and user-friendly brewing experience, allowing you to experiment with different variables to achieve your perfect cup of coffee.

4. Pour Over
4.1 Equipment Needed
To brew coffee using the pour-over method, gather the following equipment:
- Pour-over cone (such as a Hario V60 or a Chemex)
- Paper filters (specific to your pour-over cone)
- Freshly ground coffee beans
- Water
- Kettle or pot for water boiling
- Coffee mug
4.2 Brewing Process
Pour-over brewing is a technique that allows for precise control over water flow and extraction, resulting in a clean and delicate cup of coffee. Here’s how you can brew coffee using a pour-over method:
- Start by heating water to a temperature between 195°F (90°C) and 205°F (96°C).
- While the water is heating, place a paper filter inside the pour-over cone and rinse it with hot water to remove any papery taste.
- Set the pour-over cone on top of your coffee mug or carafe.
- Add your desired amount of finely ground coffee to the filter. The recommended ratio is 1 to 2 tablespoons of coffee per 6 ounces of water, but feel free to adjust based on your taste preferences.
- Once the water reaches the appropriate temperature, start pouring it slowly and steadily over the coffee grounds, starting from the center and moving in a circular motion.
- Aim for an even and steady pour, saturating all the coffee grounds while maintaining control over the water flow.
- Allow the coffee to drip through the filter and into your mug or carafe. The entire brewing process should take approximately 2-4 minutes.
- Once the dripping stops, carefully remove the pour-over cone and dispose of the used coffee grounds and filter.
- Serve and savor the flavors of your freshly brewed pour-over coffee!
4.3 Pros and Cons
Pour-over brewing is favored by coffee enthusiasts for its ability to highlight the flavors and nuances of the coffee beans. Let’s explore the pros and cons:
Pros:
- Enhanced flavor clarity: The pour-over method allows for precise control over water flow, resulting in a clean and well-extracted cup of coffee that showcases the unique flavors of the beans.
- Customizability: You can experiment with different variables, such as water temperature, pour rate, and grind size, to tailor the brewing process to your specific taste preferences.
- Aesthetically pleasing: Pour-over brewing is often appreciated for its beautiful and elegant brewing process, which can bring a touch of artistry to your coffee ritual.
Cons:
- Time-consuming: Pour-over brewing requires a bit more time and attention compared to other brewing methods, as it involves slowly and steadily pouring water over the coffee grounds.
- Skill-dependent: Achieving a consistent and well-extracted cup of coffee with pour-over brewing may require some practice and experimentation, especially in terms of water flow control.
Pour-over brewing is an excellent choice for those who enjoy a meticulous and hands-on brewing process and appreciate the delicate and nuanced flavors of their coffee.
5. Espresso
5.1 Equipment Needed
To make espresso at home, you will need the following equipment:
- Espresso machine
- Freshly roasted and finely ground coffee beans
- Tamper
- Portafilter or filter basket
- Pitcher for steaming milk (if desired)
- Water
- Coffee mug or espresso cup
5.2 Brewing Process
Espresso brewing is the foundation of many coffee-based beverages, known for its full-bodied and concentrated flavor. Here’s how you can brew espresso at home using an espresso machine:
- Start by filling the water reservoir of your espresso machine and ensuring it is adequately heated according to the manufacturer’s instructions.
- While the machine is heating the water, grind the coffee beans finely to a consistency similar to table salt.
- Once the water reaches the appropriate temperature, purge the grouphead by running a small amount of water through it to remove any residue.
- Place the filter basket into the portafilter and add the freshly ground coffee. Distribute the coffee grounds evenly, ensuring there are no clumps.
- Use a tamper to apply firm and even pressure to the coffee grounds in the filter basket. The goal is to create a consistent and compact coffee puck.
- Insert the portafilter into the grouphead and initiate the brewing process. The extraction time should ideally be around 25-30 seconds, resulting in a vibrant and flavorful shot of espresso.
- If desired, steam milk in a separate pitcher using the steam wand of your espresso machine. Froth the milk to your preferred consistency.
- Pour the extracted espresso into your coffee mug or espresso cup and add steamed milk if making a milk-based beverage like a latte or cappuccino.
- Savor every sip of your homemade espresso masterpiece!
5.3 Pros and Cons
Espresso brewing is both an art and a science, offering a concentrated and intense coffee experience. Here are the pros and cons of brewing espresso:
Pros:
- Bold and rich flavor: Espresso is renowned for its full-bodied and robust flavor profile, often described as having slight bitterness and intense aroma.
- Versatility: Espresso is the foundation of various coffee-based beverages such as lattes, cappuccinos, macchiatos, and more, allowing for endless creativity and customization.
- Quick extraction: Compared to other brewing methods, espresso offers a relatively quick brewing process, perfect for those who prefer shorter preparation times.
Cons:
- Expensive equipment: Brewing espresso at home requires an investment in a quality espresso machine, grinder, and other accessories, which can be costly.
- Steep learning curve: Achieving consistent and high-quality espresso shots may require practice and experimentation with variables like grind size, dosage, and extraction time.
- Limited quantity: Espresso brewing is typically done in small quantities, so it may not be ideal for serving large groups of people.
Espresso brewing is an exciting and rewarding journey for coffee enthusiasts who appreciate the bold and concentrated flavors that only an espresso shot can deliver.
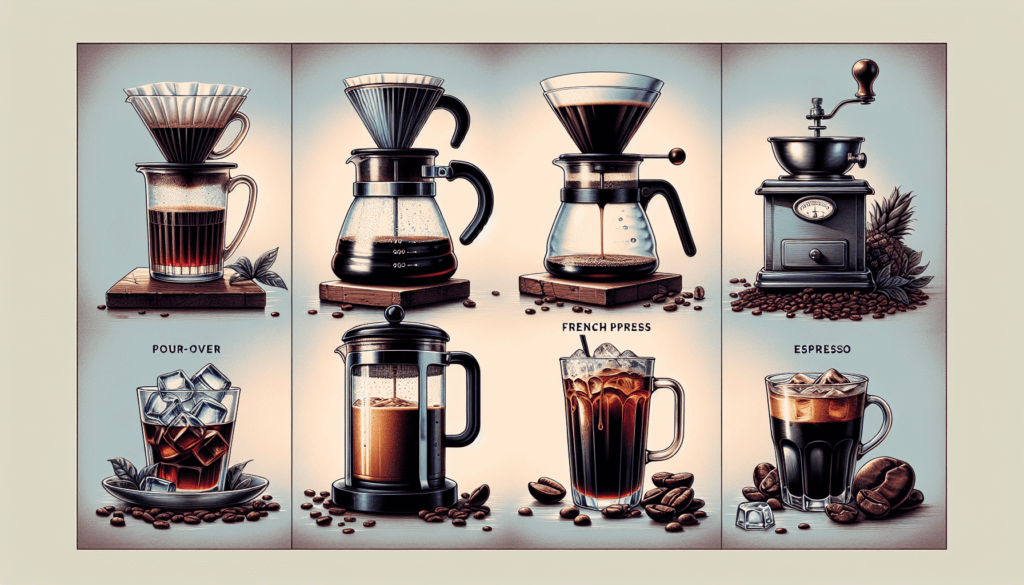
6. Turkish Coffee
6.1 Equipment Needed
To brew Turkish coffee, you will need the following equipment:
- Cezve or ibrik (a small, narrow-necked coffee pot)
- Freshly ground Turkish coffee beans (powdery consistency)
- Water
- Coffee cup
6.2 Brewing Process
Turkish coffee is a traditional brewing method that has been enjoyed for centuries. It produces a strong and aromatic coffee with a unique preparation process. Here’s how to make Turkish coffee:
- Measure the amount of water needed based on the number of cups you want to make and pour it into the cezve or ibrik.
- For each cup of coffee, add 1 heaping teaspoon of Turkish coffee to the cezve or ibrik. Adjust the amount according to your preferred taste.
- Add sugar to the cezve or ibrik if desired. The traditional method is to use 1 teaspoon of sugar per cup of coffee, but you can adjust it to your taste preferences.
- Place the cezve or ibrik over low heat and slowly bring it to a boil. Keep a close eye on it to prevent boiling over.
- As the coffee begins to heat, you will notice a foam layer forming on the surface. Allow the foam to rise without boiling over and gently stir it to distribute the coffee grounds.
- Repeat the process two more times, allowing the foam to rise and stirring gently.
- After the third time, remove the cezve or ibrik from the heat when the coffee is just about to boil.
- Let the coffee rest for a minute or two to allow the grounds to settle.
- Pour the coffee into small cups, ensuring an equal amount of foam is distributed among the cups.
- Allow the coffee to sit for a moment to let any remaining grounds settle, and then enjoy your flavorful cup of Turkish coffee.
6.3 Pros and Cons
Turkish coffee brewing is steeped in tradition and provides a unique and full-flavored coffee experience. Let’s explore the pros and cons:
Pros:
- Rich and intense flavor: Turkish coffee offers a strong and full-bodied taste, perfect for those who enjoy bold and aromatic brews.
- Cultural experience: Brewing Turkish coffee is a cultural tradition that has been passed down through generations, allowing you to connect with a rich history.
- No special equipment needed: You don’t need an expensive coffee machine or other advanced equipment to make Turkish coffee. A simple cezve or ibrik is sufficient.
Cons:
- Fine grind requirement: Turkish coffee requires a very fine grind, almost powdery, which may not be achievable with a regular grinder.
- Sludge at the bottom: Due to the fine grind, some coffee grounds may settle at the bottom of your cup, which some people might find undesirable.
- Requires close monitoring: Turkish coffee requires careful attention and monitoring during the brewing process to prevent boiling over and to ensure the coffee reaches the optimal point.
Turkish coffee brewing offers a delightful cultural experience and a unique flavor profile that coffee enthusiasts can appreciate.
7. Cold Brew
7.1 Equipment Needed
To make cold brew coffee, gather the following equipment:
- Cold brew coffee maker or a jar with a lid
- Coarsely ground coffee beans
- Water
- Coffee grinder (if you don’t have pre-ground coffee)
- Coffee filter or cheesecloth
7.2 Brewing Process
Cold brew coffee is known for its smooth and low-acidity taste profile, making it a popular choice for hot summer days or those who prefer less acidic drinks. Here’s how to make cold brew coffee:
- Start by grinding your coffee beans into a coarse grind size, similar to sea salt. Alternatively, you can use pre-ground coffee suitable for cold brew.
- In your cold brew coffee maker or jar, add the desired amount of coarsely ground coffee. As a general guideline, use a ratio of 1 part coffee to 4 parts water. You can adjust the ratio depending on your personal taste preferences.
- Pour cold, filtered water over the coffee grounds, ensuring all the grounds are fully saturated. Stir gently to ensure even extraction.
- Cover the jar or cold brew coffee maker and let it steep in the refrigerator for at least 12 hours or up to 24 hours for a stronger brew.
- After the steeping time, remove the coffee grounds using a coffee filter or a cheesecloth as you pour the cold brew into another container.
- Store the cold brew in the refrigerator and enjoy it over ice or dilute it with water or milk according to your taste preferences.
7.3 Pros and Cons
Cold brew coffee has gained popularity for its smooth and less acidic flavor. Here are the pros and cons of brewing cold brew coffee:
Pros:
- Smooth and low acidity: Cold brew coffee tends to have a milder and less acidic taste compared to hot brewed coffee, making it suitable for those with sensitive stomachs or acid reflux.
- Long shelf life: Cold brew coffee can be stored in the refrigerator for several days, allowing you to enjoy multiple servings without having to brew it daily.
- Versatility: Cold brew coffee can be enjoyed on its own over ice, diluted with water, or mixed with milk to create refreshing and customizable coffee-based beverages.
Cons:
- Longer brewing time: Cold brew coffee requires a longer brewing time compared to other methods, as the extraction process happens slowly over several hours.
- Less flavor complexity: Some coffee enthusiasts argue that cold brew coffee lacks some of the nuanced flavors and aromas that can be achieved through other brewing methods.
- Requires planning ahead: As cold brew requires steeping time, it’s important to plan in advance to have your cold brew ready when you desire it.
Cold brew coffee offers a refreshing and smooth coffee experience, perfect for those seeking a cooler alternative with a lower acidity level.
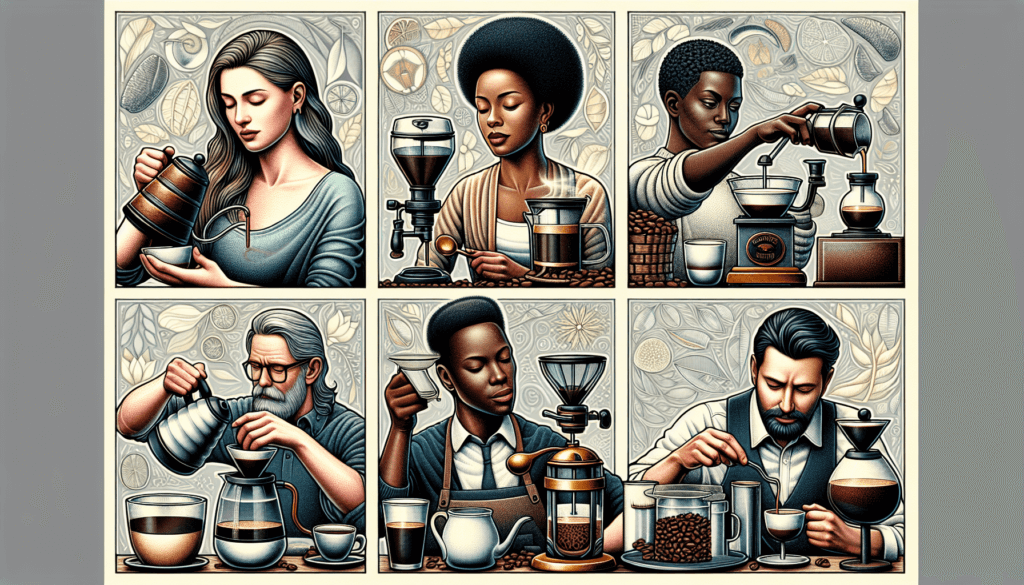
8. Moka Pot
8.1 Equipment Needed
To brew coffee using a Moka Pot, gather these essential items:
- Moka Pot
- Coarsely ground coffee beans
- Water
- Coffee kettle or pot
- Coffee grinder (if you don’t have pre-ground coffee)
- Coffee mug
8.2 Brewing Process
The Moka Pot, also known as a stovetop espresso maker, produces a rich and strong coffee with a similar intensity to espresso. Here’s how to make coffee using a Moka Pot:
- Start by heating water in a kettle or pot until it reaches a temperature just below boiling, around 200°F (93°C).
- While the water is heating, unscrew the Moka Pot and remove the filter basket and funnel.
- Fill the lower chamber of the Moka Pot with hot water from the kettle, ensuring it reaches just below the valve.
- Place the filter basket on top of the lower chamber and fill it with coarsely ground coffee. Level the coffee grounds without packing them tightly.
- Reattach the top chamber of the Moka Pot, making sure it is tightly sealed. Be cautious as the bottom chamber and filter basket may still be hot.
- Place the Moka Pot on the stovetop over low to medium heat. Ensure the handle is not exposed to direct heat.
- Allow the water in the bottom chamber to heat and create pressure, which will force the brewed coffee to rise to the top chamber.
- As the coffee begins to flow into the top chamber, remove the Moka Pot from the heat source to prevent over-extraction or burning.
- Give the brewed coffee a gentle stir before pouring it into your coffee mug.
- Allow the coffee to rest for a moment to let the flavors settle, and then enjoy your rich and aromatic cup of Moka Pot coffee!
8.3 Pros and Cons
The Moka Pot is a classic and beloved brewing method for its ability to produce a rich and concentrated coffee similar to espresso. Let’s explore the pros and cons:
Pros:
- Intense and flavorful coffee: The Moka Pot brewing process extracts bold and robust flavors, creating a coffee with a similar intensity to espresso.
- Simplicity: Moka Pot brewing is relatively straightforward and doesn’t require complex equipment or technical skills.
- Portable: Moka Pots are compact and portable, making them ideal for brewing coffee while camping, traveling, or at home without an espresso machine.
Cons:
- Requires heat source: Moka Pots rely on a heat source, such as a stovetop or camping stove, so they may not be suitable for situations where a heat source is not available.
- Over-extraction risk: It’s essential to carefully monitor the brewing process to avoid over-extraction, as it can lead to a bitter and burnt taste.
- Limited quantity: Moka Pots usually brew smaller quantities of coffee, typically 1 to 3 cups, so they may not be suitable for larger gatherings.
The Moka Pot offers a reliable and affordable way to enjoy a strong and flavorful coffee, perfect for those who appreciate the taste and intensity of espresso-like brews.
9. Siphon Brewing
9.1 Equipment Needed
To brew coffee using a siphon, gather the following equipment:
- Siphon coffee maker
- Burner or electric heat source
- Freshly ground coffee beans
- Water
- Coffee grinder (if you don’t have pre-ground coffee)
- Coffee kettle or pot
- Coffee mug
9.2 Brewing Process
Siphon brewing, also known as vacuum brewing, produces a clean and visually appealing cup of coffee. Here’s how to make coffee using a siphon coffee maker:
- Fill the lower chamber of the siphon coffee maker with water, filling it up to the manufacturer’s recommended level.
- Place the filter assembly in the lower chamber, ensuring it fits snugly.
- Assemble the upper chamber on top of the lower chamber, making sure it forms a tight seal.
- Place the siphon coffee maker on a heat source, either a burner or electric heat source.
- Apply heat to the lower chamber, bringing the water to a boil.
- As the water in the lower chamber heats, the pressure will push the water vapor up into the upper chamber, bringing it in contact with the coffee grounds.
- Add coarsely ground coffee to the upper chamber and gently stir to ensure all the coffee grounds are saturated.
- Allow the coffee to steep in the upper chamber for the desired amount of time, typically between 1 to 3 minutes.
- After the steeping time, remove the heat source. As the lower chamber cools, it creates a vacuum, drawing the brewed coffee back down.
- As the coffee returns to the lower chamber, it filters through the filter assembly, leaving behind any coffee grounds.
- Once the entire brewing process is complete, carefully separate the upper and lower chambers.
- Pour the freshly brewed coffee into your mug, marvel at its clarity, and enjoy!
9.3 Pros and Cons
Siphon brewing is a visually captivating and precise brewing method that produces a clean and flavorsome cup of coffee. Let’s explore the pros and cons:
Pros:
- Visual spectacle: Siphon brewing is an enchanting brewing process that captures attention and adds a touch of drama to your coffee brewing ritual.
- Clean and aromatic coffee: The siphon brewing method results in a clean and full-bodied coffee with intense aromas, showcasing the unique flavors of the beans.
- Control over variables: With siphon brewing, you have control over factors such as water temperature, steeping time, and coffee grind size, allowing you to fine-tune your brew.
Cons:
- Requires specific equipment: Siphon coffee makers are not as widely available as other brewing devices, and they may require a bit of investment.
- Learning curve: Siphon brewing requires practice and experimentation to master the proper technique and achieve consistent results.
- Requires additional care: The delicate nature of siphon coffee makers means they need careful handling and cleaning to maintain their functionality and performance.
Siphon brewing offers a captivating and delicious coffee experience for those who appreciate the visual aspect of brewing and the nuanced flavors it delivers.
10. Cowboy Coffee
10.1 Equipment Needed
To brew cowboy coffee, you won’t need much equipment. Gather the following basic items:
- Kettle or pot
- Freshly ground coffee beans (coarsely or finely ground, based on preference)
- Water
- Coffee filter or a clean cloth (optional)
- Coffee mug
10.2 Brewing Process
Cowboy coffee is a rustic and straightforward method that has been used for generations, especially during outdoor adventures. Here’s how to make cowboy coffee:
- Fill your kettle or pot with water and place it over a heat source, such as a campfire or stove.
- Once the water comes to a rolling boil, remove it from the heat momentarily to let it cool slightly, allowing the coffee to infuse better.
- Add the desired amount of coffee directly to the kettle or pot. The general guideline is 1 tablespoon of coffee per 6 ounces of water, but you can adjust it based on your taste.
- Return the kettle or pot to the heat source and let it simmer for a few minutes. Keep a close eye on it to prevent boiling over.
- Remove the kettle or pot from the heat source and let it sit for a few minutes, allowing the coffee grounds to settle at the bottom.
- To separate the coffee from the grounds, you can either pour it slowly into a coffee mug, ensuring the grounds stay in the kettle or pot, or use a coffee filter or clean cloth to strain the coffee as you pour.
- Savor the simplicity and boldness of your cowboy coffee in the great outdoors or wherever adventure takes you!
10.3 Pros and Cons
Cowboy coffee is a rugged and practical brewing method that can deliver a strong and robust cup of coffee. Here are the pros and cons:
Pros:
- Simplicity: Cowboy coffee is one of the simplest brewing methods, requiring minimal equipment and no specialized brewing devices.
- Portability: Cowboy coffee can be brewed almost anywhere, making it a great option for camping, hiking, or situations where other brewing methods may be inaccessible.
- Full-bodied flavor: Cowboy coffee tends to be bold and strong, allowing you to enjoy the hearty and robust flavors of the coffee beans.
Cons:
- Potentially sediment-filled: Due to the absence of a filter, cowboy coffee may contain some sediment or coffee grounds, which some people may find undesirable.
- Consistency challenges: Achieving consistent results with cowboy coffee can be challenging, as variables like steeping time, coffee-to-water ratio, and grind size may fluctuate with each brewing attempt.
- Requires careful handling: Since cowboy coffee is made directly in a kettle or pot, ensuring proper handling to avoid scorching or over-extraction is essential.
Cowboy coffee brings a touch of nostalgia and adventure to the coffee brewing experience, making it a perfect choice for outdoor enthusiasts, campers, or those who appreciate its rustic charm.
With these ten coffee brewing techniques, you have a delightful array of options for creating your perfect cup of coffee. Whether you prefer the convenience of drip brewing, the intensity of espresso, or the purity of pour-over, there’s a brewing method to satisfy every coffee lover’s taste. So explore, experiment, and savor the diverse flavors and aromas that each technique brings. Cheers to coffee brewing adventures!
